
SproutVideo offers the ability to generate and display manually uploaded subtitles along with videos. All videos uploaded after April 16th, 2025 (20:30 UTC) will have subtitles automatically generated for them. Generated subtitles are set to a Draft by default and will not appear to viewers until Published.
Any video Replaced after April 16th, 2025 will have subtitles automatically generated.
When manually uploading subtitles, we support the WebVTT and SRT standards. We do not support the entire standard but if you have any questions about our implementation or what we do and do not support, please contact support@sproutvideo.com.
- How to Generate a Subtitle Track
- How to Upload Subtitles and Closed Captions
- How to Publish a Subtitle Track
- How to Set a Default Subtitle Track
- The WebVTT Standard
- Device Support
How to Generate a Subtitle Track
To generate a subtitle track for videos uploaded before April 16th, 2025 navigate to the video, then open the Manage Subtitles page. You can manage your subtitiles by expanding the ‘Additional Video Settings’ section.
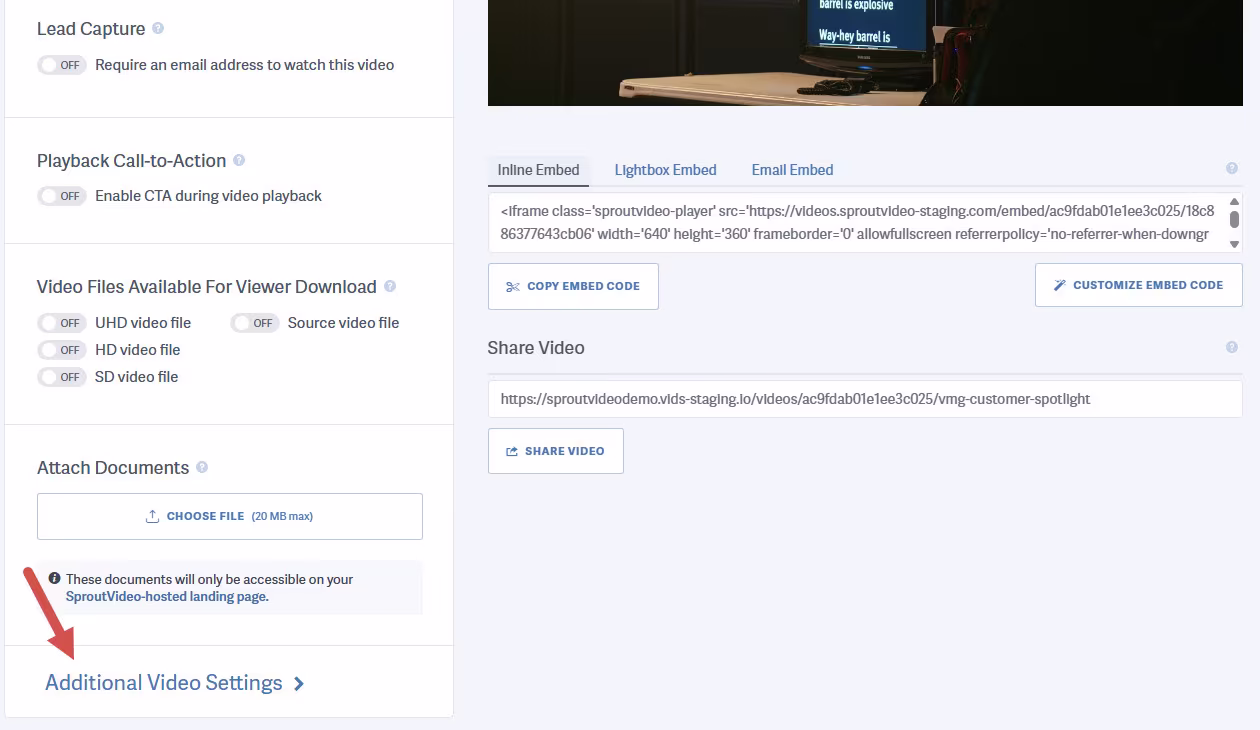
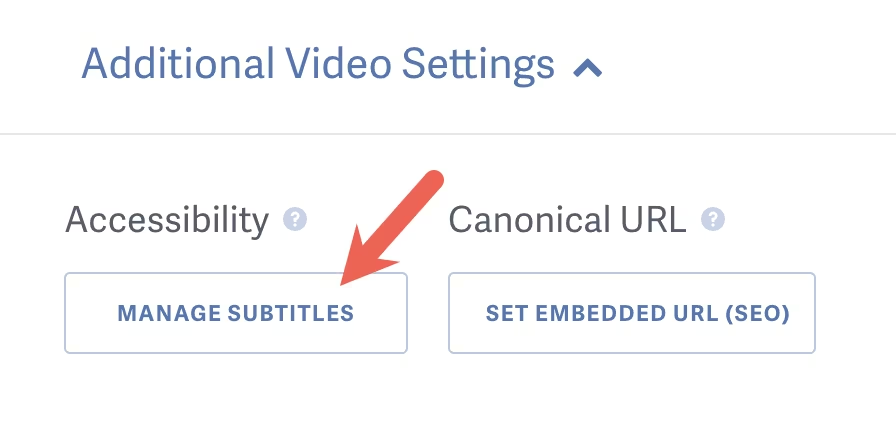
Then click the ‘Manage Subtitles’ button.
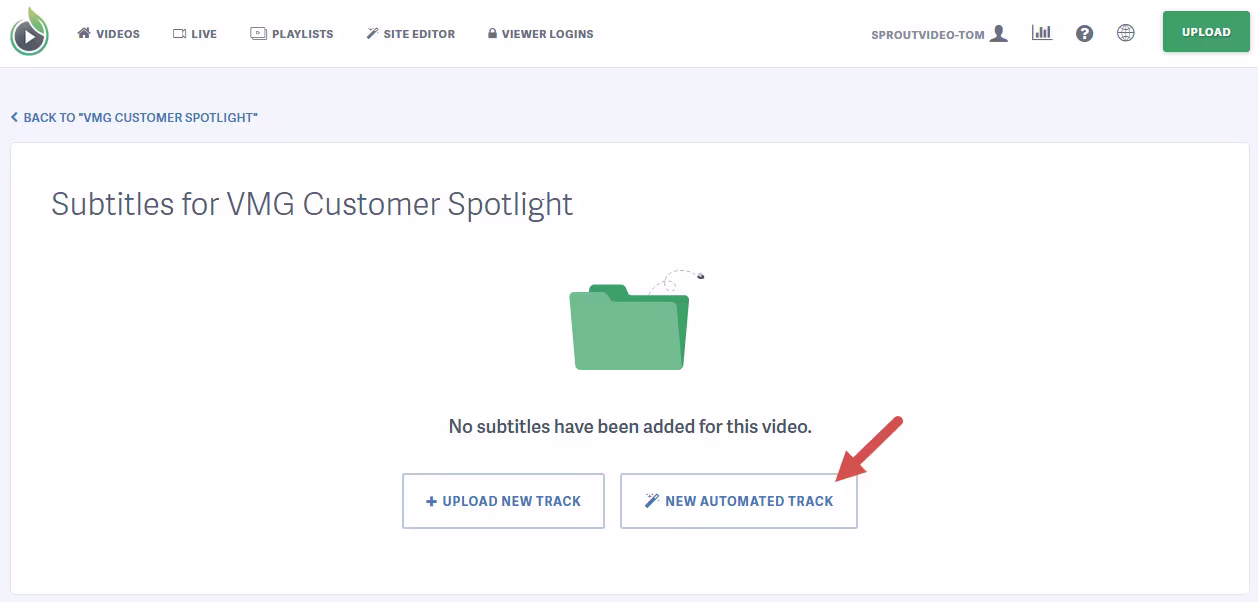
To request a track click the ‘Generate Automated Track’ (if you already have tracks associated) or ‘New Automated Track’ buttons.
Select the settings you wish to apply to the automated subtitle track when its complete.

NOTE: We recommend using “Auto-Detect” unless the spoken language is consistently misidentified or the video is clearly in one language. Setting a language overrides automatic detection and may reduce accuracy for multilingual content.
Transcription processing begins upon clicking ‘Generate Automated Subtitles’. We’ll send you an email notification when the automated subtitle track is complete.
Change Account Settings
To change the default behavior for Automated Subtitles in your account navigate to your Media Settings page.
Scroll down to the “Automated Video Transcription (Subtitles)” section.
Here you can disable Automated Video Transcriptions for newly uploaded videos, specify a language preference, change the default visibility and force display options for all of the newly uploaded or replaced videos in your account.

How to Upload Subtitles and Closed Captions
To manually upload a subtitle track go to the video for which you’d like to add subtitles, then expand the ‘Additional Video Settings’ section, and click on the ‘Manage Subtitles’ button:
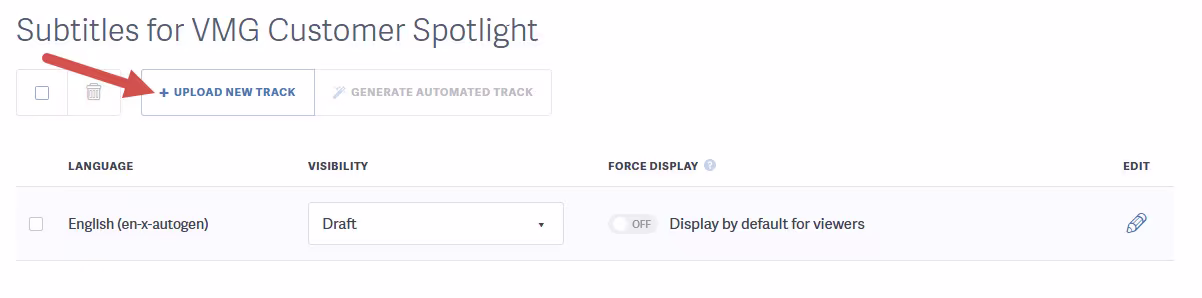
Click the ‘+ Upload New Track’ button:
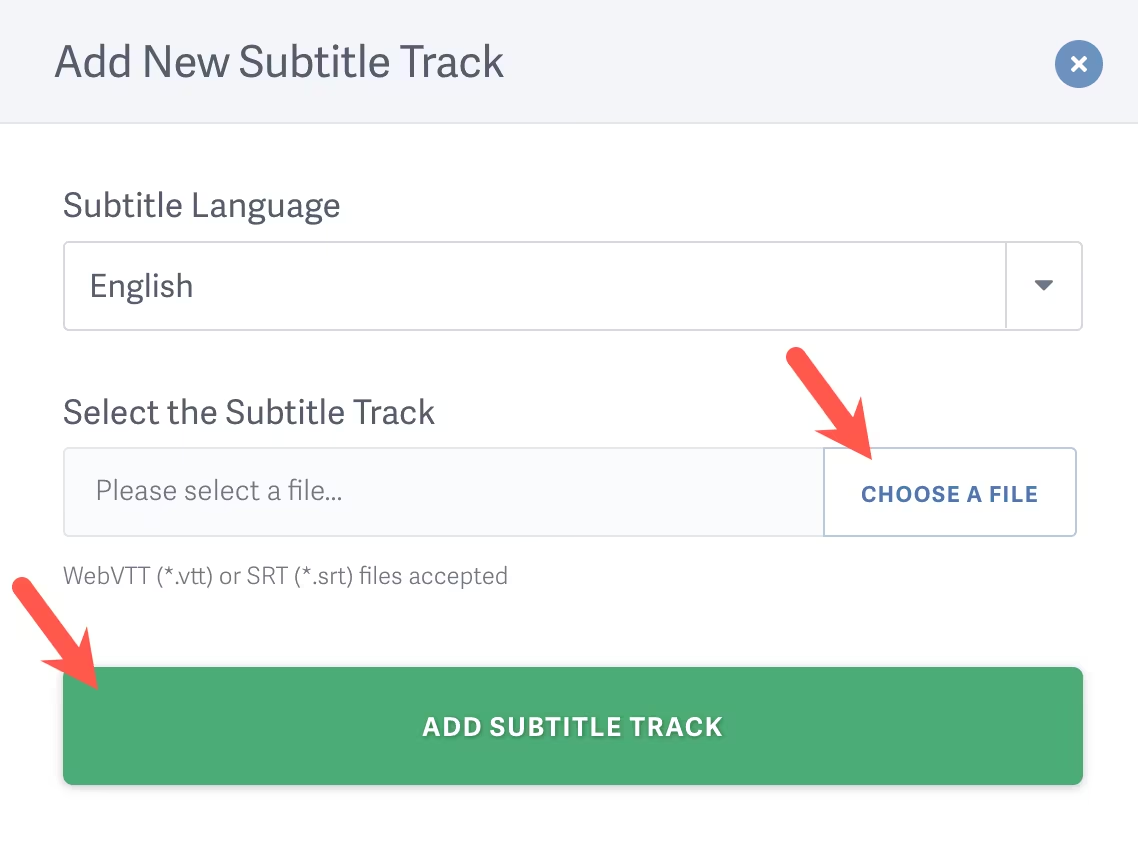
Select the language for the subtitle track, click ‘Choose A File’, then select the WebVTT or SRT file on your computer and click open. After selecting your file, click ‘Add Subtitle Track’:
Your video will now display the subtitle button in the video player and viewers will be able to select the subtitle track when watching the video.
How to Publish a Subtitle Track
By default, uploaded and generated subtiles will be stored as a Draft until Published (unless you changed your Account Settings explained above).
To Publish a subtitle track, navigate to the Manage Subtitles page.
Here you can see all of the subtitles tracks for the video, change the Visibility option, Default Display setting, and even Edit the text.

How to Set a Default Subtitle Track
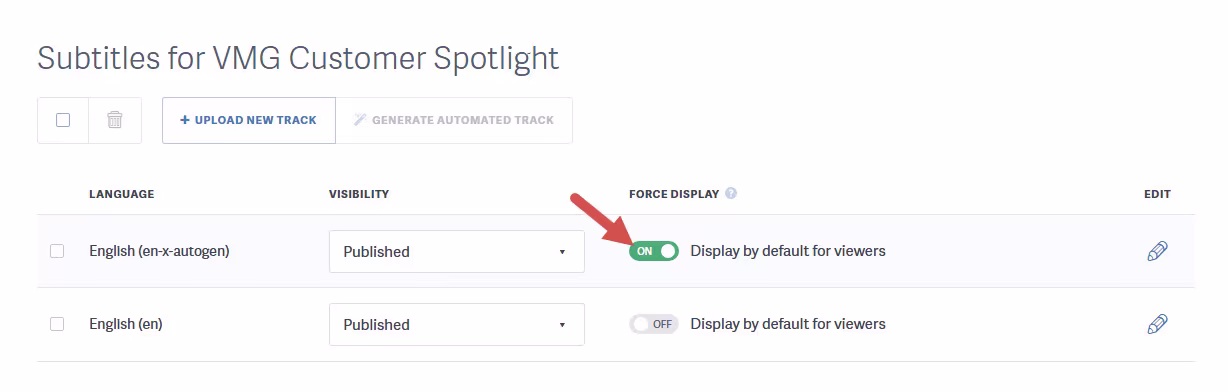
By setting a default subtitle track, your viewers will see the subtitles appear automatically in the player.
Once the subtitle track has been uploaded, you can enable a default subtitle track by clicking the toggle switch for the language you wish to display.
The WebVTT Standard
We chose the WebVTT standard because it is starting to become widely adopted by all of the major web browsers for HTML5 subtitle and captioning support and provides a simple, extensible, and human-readable format on which to build timed text tracks. The WebVTT format is very simple. A WebVTT file must start with the header “WEBVTT”. After that it is followed by one or more “cues”. At it’s simplest, a cue consists of a “timing” and “cue text”. Here is an example:
WEBVTT

00:00:01.000 --> 00:00:10.000
This is the first line of text, displaying from 1-10 seconds

00:00:15.000 --> 00:00:20.000
And the second line of text, appearing from 15-20 seconds
For the complete WebVTT standard, click here.
Device Support
Subtitles are supported on all devices when using the Adobe Flash video player. The HTML5 player supports subtitles in the following environments:
- Internet Explorer 10+
- Edge 12+
- Firefox 38+
- Google Chrome 31+
- Safari 8+
- Opera 32+
- iOS Safari 8.4+
- Android: 4.4+
- Google Chrome for Android: 45+
Other articles in the Playing Videos section:
